

Difficulty: Easy ★☆☆☆☆

Materials you will need:
- The template
- Black and yellow or white felt
- A black permanent marker
- Scissors good for cutting paper
- Scissors good for cutting fabric
- A hole punch
- A hot glue gun/ glue
- Ribbon/ string
- A pen/ pencil
- White chalk/ white pencil crayon (something that will show up on black felt)

The first thing you'll need to do is print out the template.


Once you have the template printed out, go ahead and cut out the two pieces.
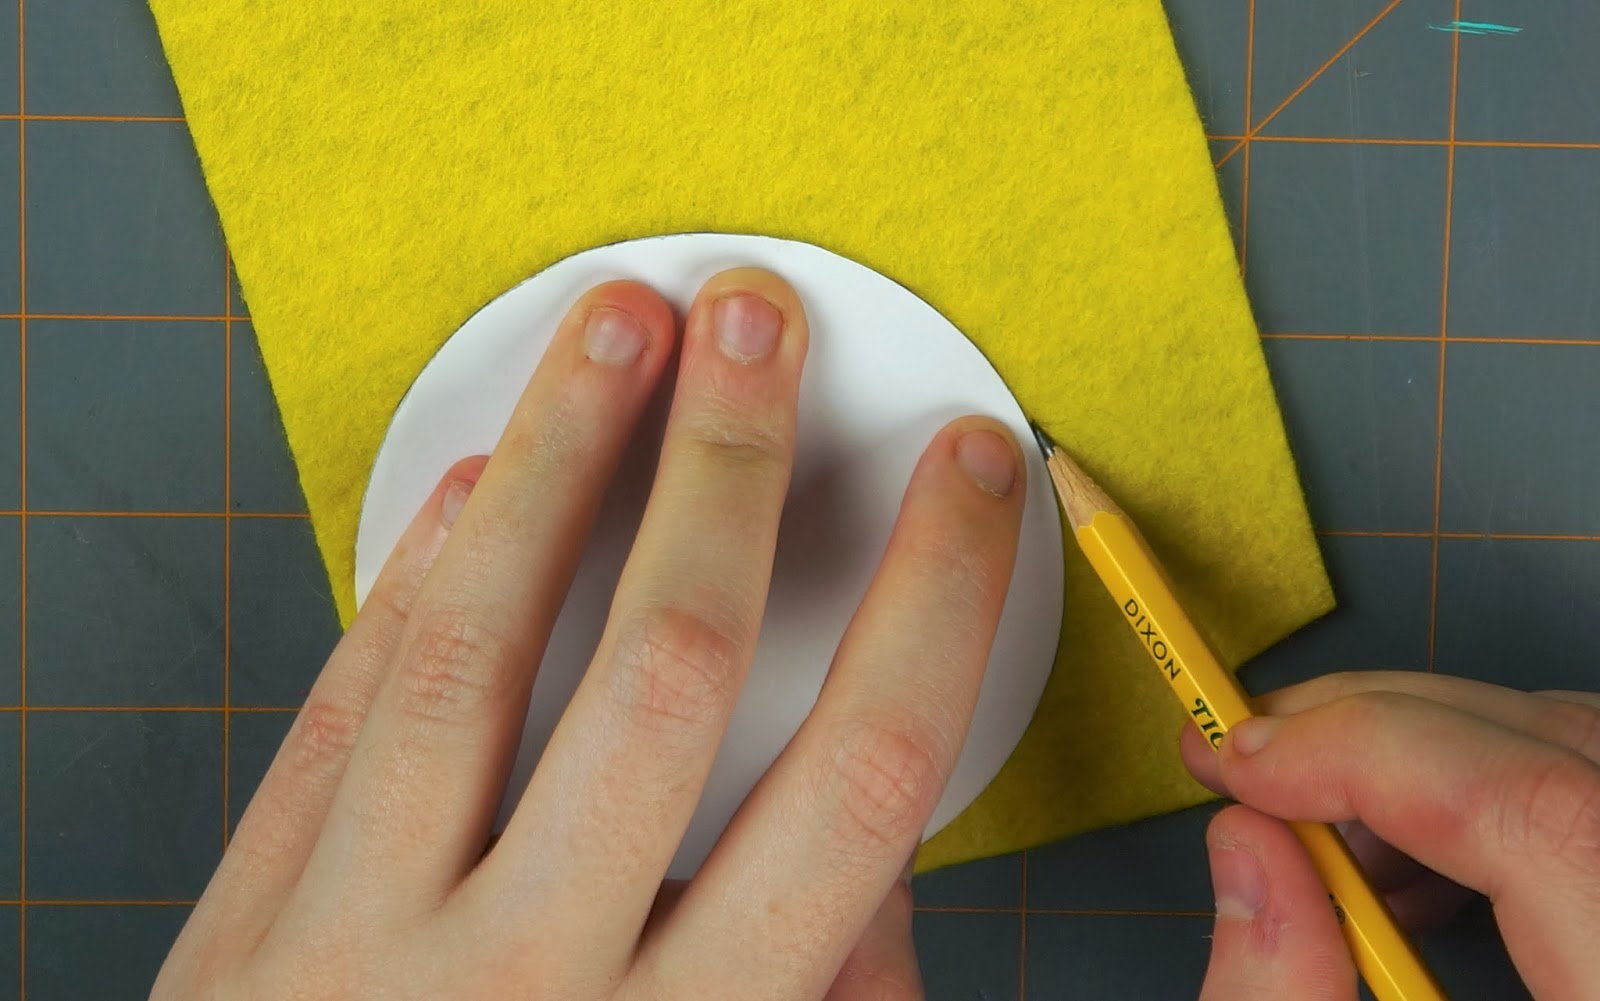


Next, trace the circle template onto some yellow or white felt. Then, cut the felt circle out.


Then trace the swirl onto some black felt. Make sure to trace it backwards so that you won't see the chalk lines when you glue it to the circle.


Line up the edge of the swirl with the edge of the circle, then glue the swirl onto the circle.


Next, punch or cut a hole into the top of the circle. Make sure it's not too close to the edge so that the hole won't rip when you hang it.


With a black permanent marker, draw Jack's silhouette onto the circle, just above the swirl so that he looks like he's standing on the hill. You might want to use a reference photo from the movie to help you out.

Then you can cut a piece of ribbon or string, thread it through the hole and tie the two ends together. There you have your finished Nightmare Before Christmas ornament!
No comments:
Post a Comment