

Difficulty: Easy ★★☆☆☆

Materials you will need:
- The Template
- Glue
- Scissors/craft knife
- Pen/ pencil
- Ribbon/ string
- A black and white photo (optional)
- A brown/ dark marker (optional)
View Template | Download Template
The first thing you're going to want to do is print out the template, which can be downloaded here. We've printed ours out on some card stock but any paper thickness will work. The thicker the paper, the sturdier it will be.


Once you have the template printed out, cut out the pieces on the first page. We won't be using the circle labeled 'picture template' until the very end, so you can wait and cut that out later if you prefer. If you are using a thicker paper you might want to go along the edges of the pieces with a dark maker so you don't see any white when it's glued together.


Taking piece 1, start by cutting the tabs on the rounded corners in half. Then, fold all of the tabs inward.


Now taking pieces 2 and 3, fold all of the tabs along the side inward as well (don't worry about folding the larger tabs at the end of piece 2). Then put some glue on the tab at the end of piece 2 and glue pieces 2 and 3 together. Make sure that you've glued it so that the tabs are all along the one side.


Then fold along the line on pieces 2 and 3 and glue the folded piece down on the other side.


Go back to piece 1 and begin to glue the strip that's pieces 2 and 3 to it. Start from the bottom and work your way around. You want to glue the tabs on piece 1 to the edge of the folded part on the strip so that you have a lip around the edge of the front. When you get back around to the bottom you can either trim the excess strip or overlap it and glue it down.


Now we can move on to piece 4. Before we start to glue it on, you'll want to slit the tabs on the corners of the strip so that they will glue onto piece 4 easier and cleaner. Then you can go ahead and glue piece 4 onto the other side of the strip to make the back of the Farnsworth.


Now you can cut out all of the second page, which is the rest of the pieces.


Starting with pieces 5 and 6, fold all of the tabs along the sides just like we did for pieces 2 and 3. Then glue 5 and 6 together, again, make sure that all of the tabs are along one side. Then you can fold the strip down the middle, on the line and glue the folded sides together.


Now we're going to glue the strip (pieces 5 and 6) to piece 7. Again, you'll want to cut the tabs that fall on a corner in half. You're going to be gluing it so that the strip faces the same side as the coloured side of piece 7. This means that you're actually putting glue on the backside of the tab (the side that the pieces aren't printed on). Start on one of the shorter sides and work your way around, then when you get back to your starting side, trim or overlap the excess strip, just like with the other side of the Farnsworth.


Moving on to piece 8, simply glue it to the back of piece 7.


Now to piece 9, the last piece, start by folding along either side of the hinges. You'll notice that one side is slightly shorter (from the hinges to the edge of the piece) and lighter in colour than the other side, glue the shorter side to the screen part of the Farnsworth along the middle part of the lip, and then the longer side to the lid.


Next, taking some scissors or a craft knife, poke two holes; one along the middle of the top, closer to the back and the other in the middle upper back of the Farnsworth. Then cut a length of ribbon or string and feed it through the two holes. Then tie the two ends together.


Now it's time to add a photo to the Farnsworth if you want. If you haven't done so already, cut out the 'Picture Template' circle. Then you'll need a picture. You can use one of your favourite Warehouse 13 character or couple *winks*, or you can use a photo of friends/ family, yourself, or even a pet, whatever you like. For the authentic Farnsworth look, print the photo in black and white.
Take the picture template and trace the circle onto your picture, then cut your picture out into the circle shape. Now line your picture up with the black circle on the Farnsworth and glue it down.

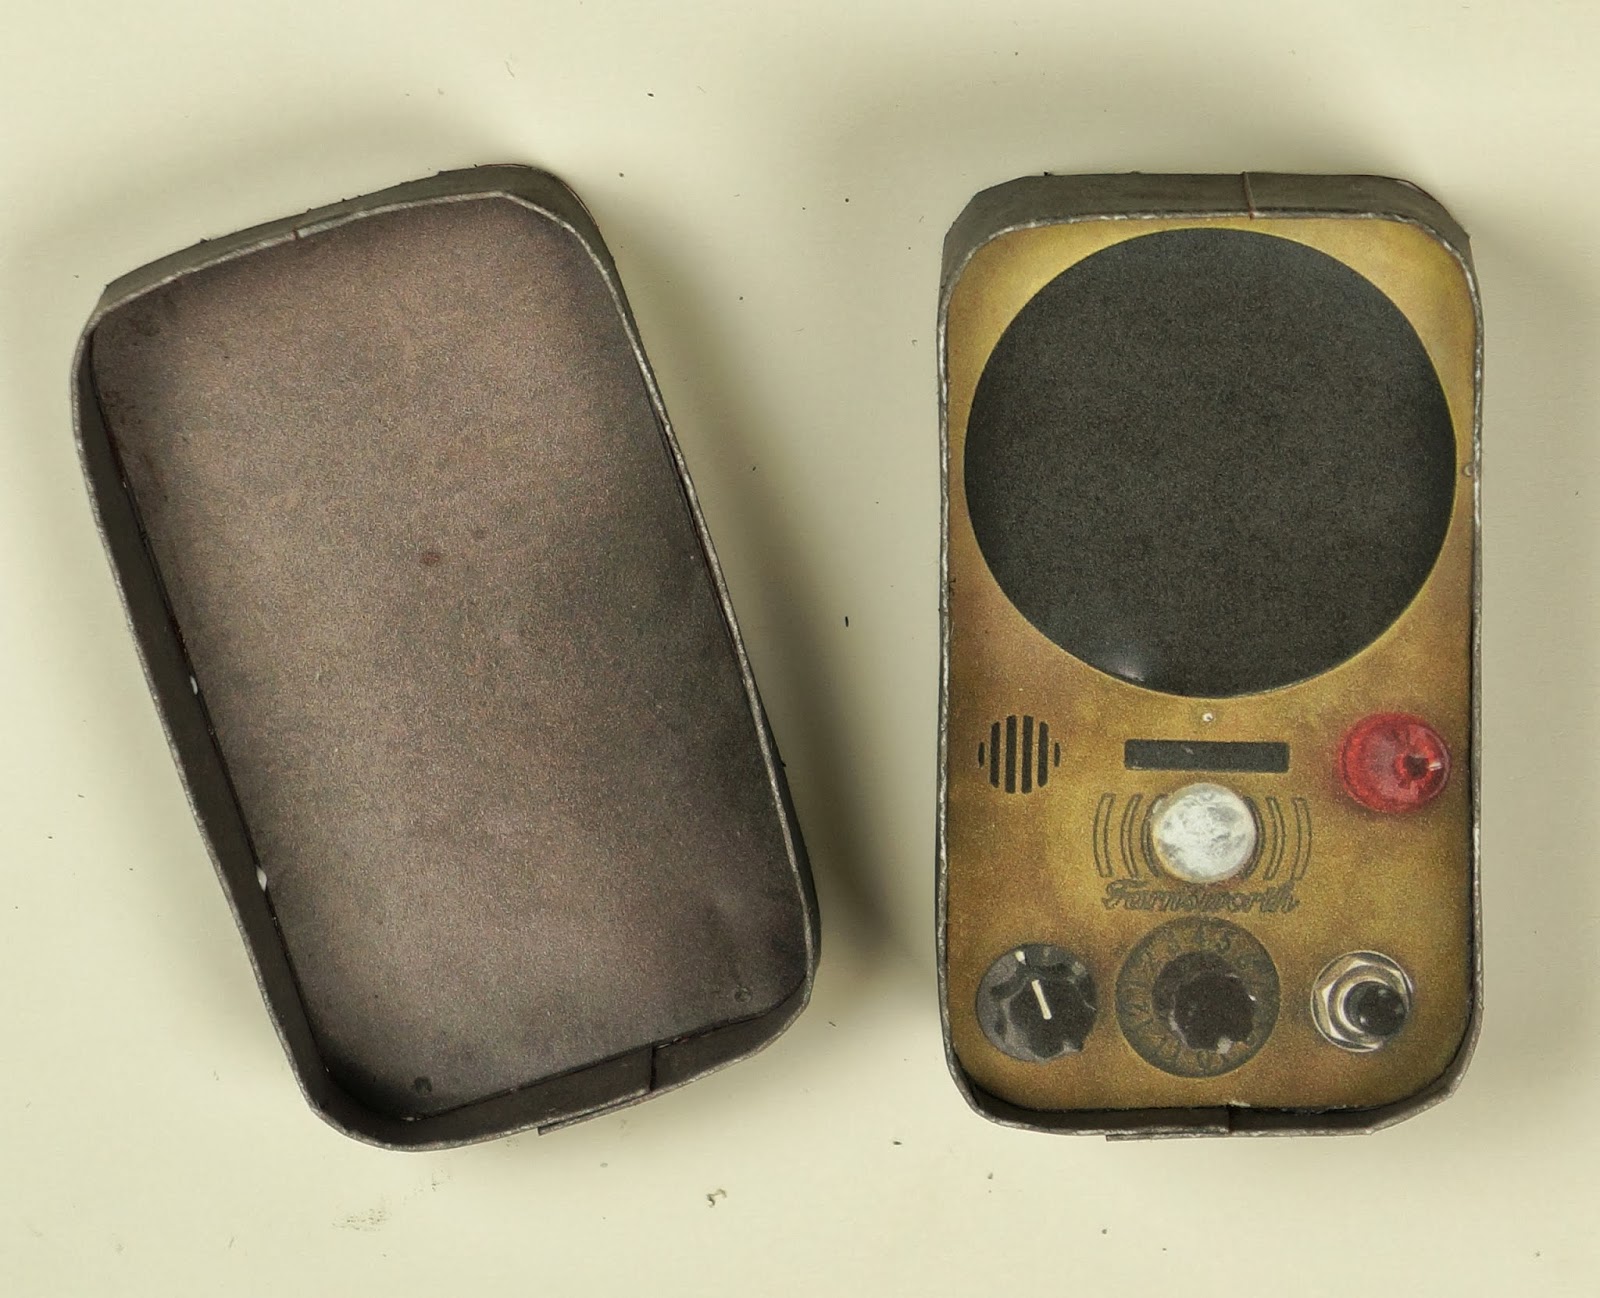
There you have your finished Farnsworth ornament!
No comments:
Post a Comment