

Difficulty: Medium - Hard (depending on amount of cubbyholes) ★★★★☆

You will need:
- foam board or cardboard
- cotton fabric in a solid colour of your choice
- white felt or foam sheets
- symbol templates of your choice
- thin cardboard (like a cereal box or file folder) or card stock paper
- a ruler and/or measuring tape
- scissors and/or craft knife
- a pencil/pen
- a box cutter/ surface protector
- a hot glue gun/ hot glue sticks
- picture hanging trips (optional)

Start off by figuring out how large you want to make your display case (how many cubbyholes you want). Each Amiibo section will be 4" x 4". You will also need to measure the thickness of your cardboard/ foam board and add that into the final measurements. Ours is going to have 12 Amiibo sections; 3 sections wide, 4 sections long. The cubbyholes alone would make the measurements 12"x16". The foam board that we're using is 1/4" thick. Because we're making ours 3 x 4 cubbyholes that means we have 2 foam board thickness horizontally and 3 foam board thickness vertically to add onto our measurements. You also need to add the sides of the actual display case into the measurements as well. This means our final measurements are 13" x 17 1/4".


Once you have the size figured out, measure and mark your foam board/ cardboard using a ruler and a pencil/pen. Then carefully cut your square/ rectangle with a box cutter. This piece will be the back of your display case.


Now to work on the sides of the display case. No matter what size you've chosen to make the sides of the display case need to be 3" thick/ wide. Make 2 of your sides (opposite sides) the same length/width as your back piece x 3" wide (13" x 3" for us). The other 2 opposite sides need to have the thickness of the 2 other sides subtracted (if your material is 1/4" thick, subtract 1/2" from the length)(16 3/4" x 3" for us). Again, mark your measurements onto your cardboard then cut out.


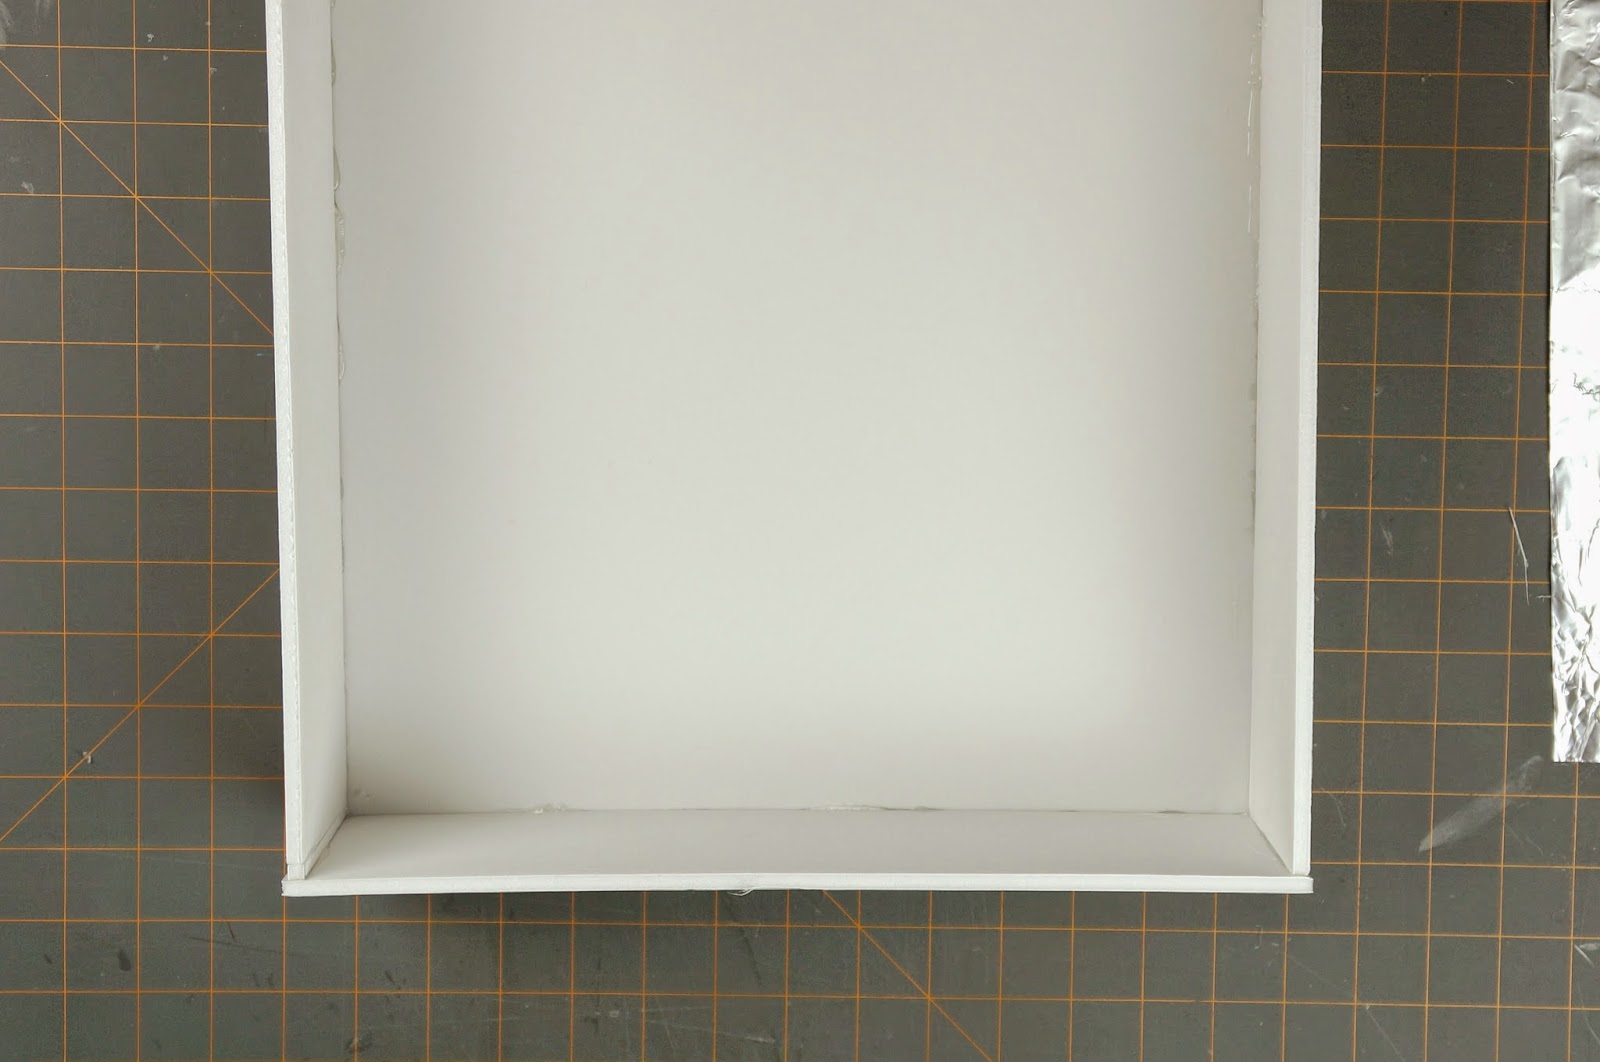
Start off by hot gluing one of the sides that is the same size as your back piece onto the back piece. Make sure you are gluing the edge of the side onto the face of the back piece and not the edge of the back piece onto the face of the side. Next glue the sides that have the 2 thicknesses subtracted from their length onto the back piece as well. Make sure to also put some glue on one of the shorter sides to stick it to the side already attached to the board. Finally, glue the last side onto the board.


Place your display box onto your fabric and trace around the edge. Measure your the thickness of the outside of your display case as well as the inside. Add panels the same length as the sides onto the sides of your traced box that are the width of the outside + 1 thickness of your material + the width of the inside (13" x 6 1/2" and 17 1/4" x 6 1/2" for us).


Add 1/2" strips to all the sides of the panels you just added. Once you have all your 1/2" strips added cut out your fabric. Make sure to cut one of the strips that intersect all the way down on both sides of the same panel and on the panel on the opposite side.


Put some glue onto one of the extra strips that is cut all the way down and fold it onto the backside of the fabric (the side that has all your marks). Do the same for the other side strip and repeat for the other 2 side strips of the opposite panel.


Glue some scrap pieces of your fabric onto the back corners of your box. Next glue the backside of your display case onto the center of the fabric piece.


Next glue the side tabs that you didn't fold and glue onto the side of the box. Wrap the rest of the side panel into the box and glue the tab at the end of the panel to the bottom of the inside of the display box. Make sure the rest of the side tabs are glued to the inside of the box as well. Repeat for the opposite side.


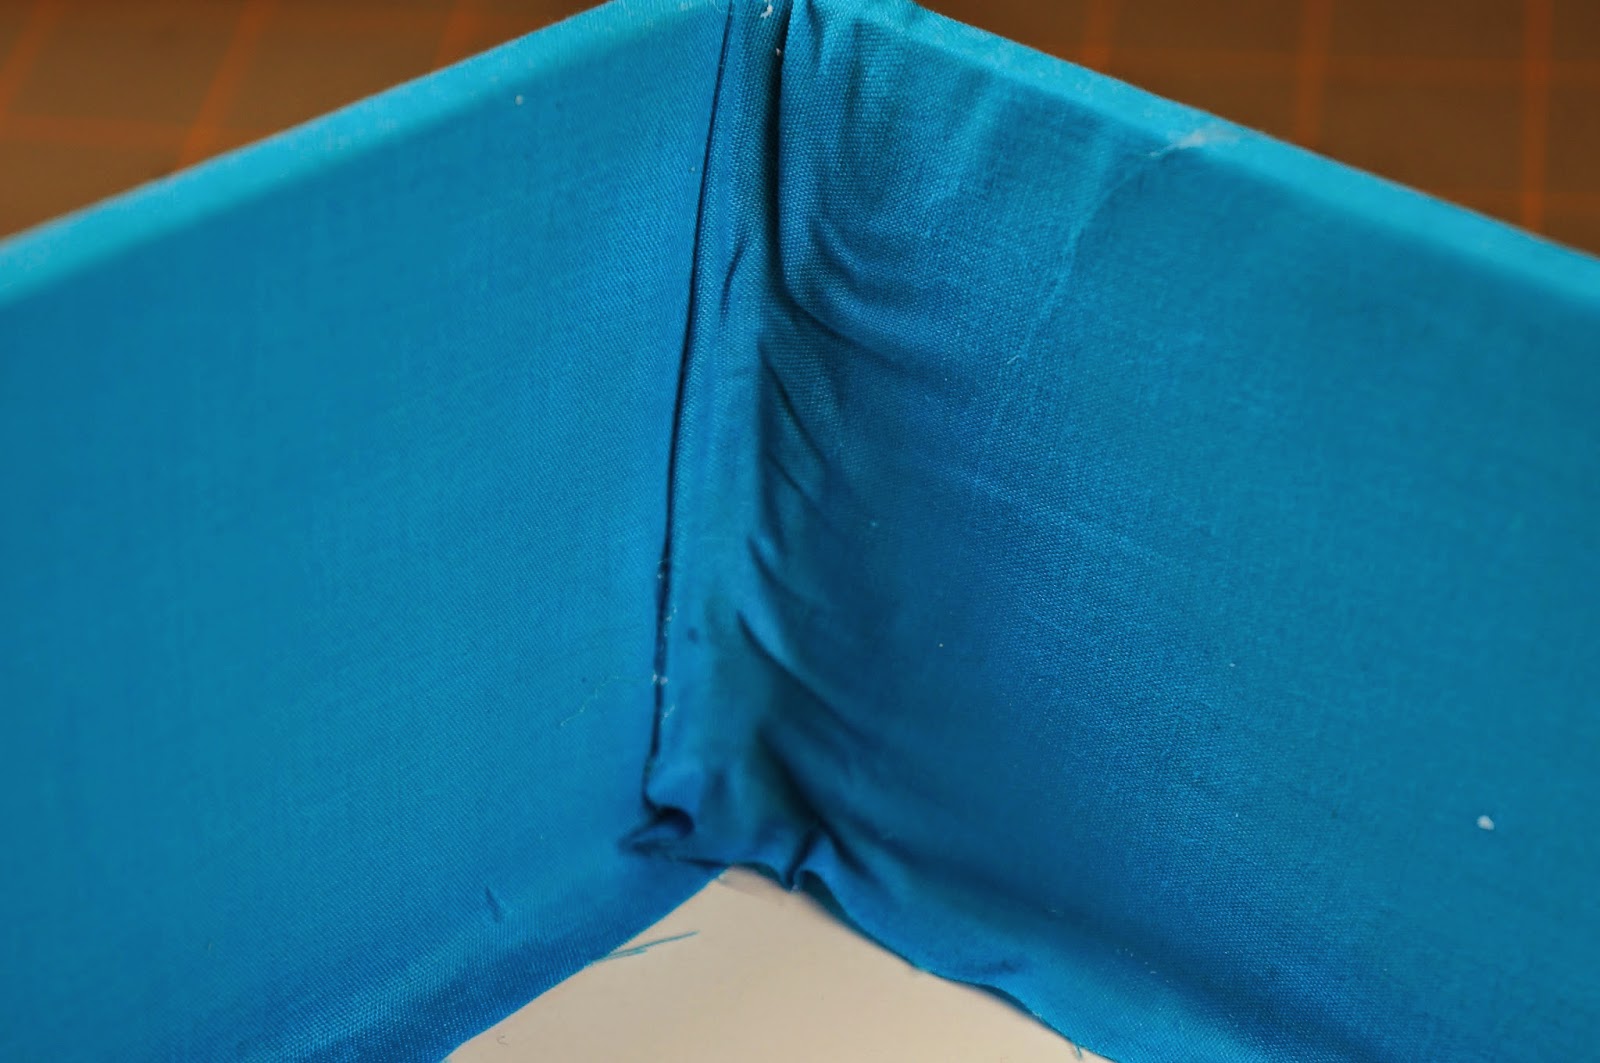
Glue the side panels that do have the folded in tabs onto the side of the display box. Wrap the remaining panel and glue the 1/2" tab to the bottom of the inside of the box like you did for the first 2 sides. Repeat for the final panel.


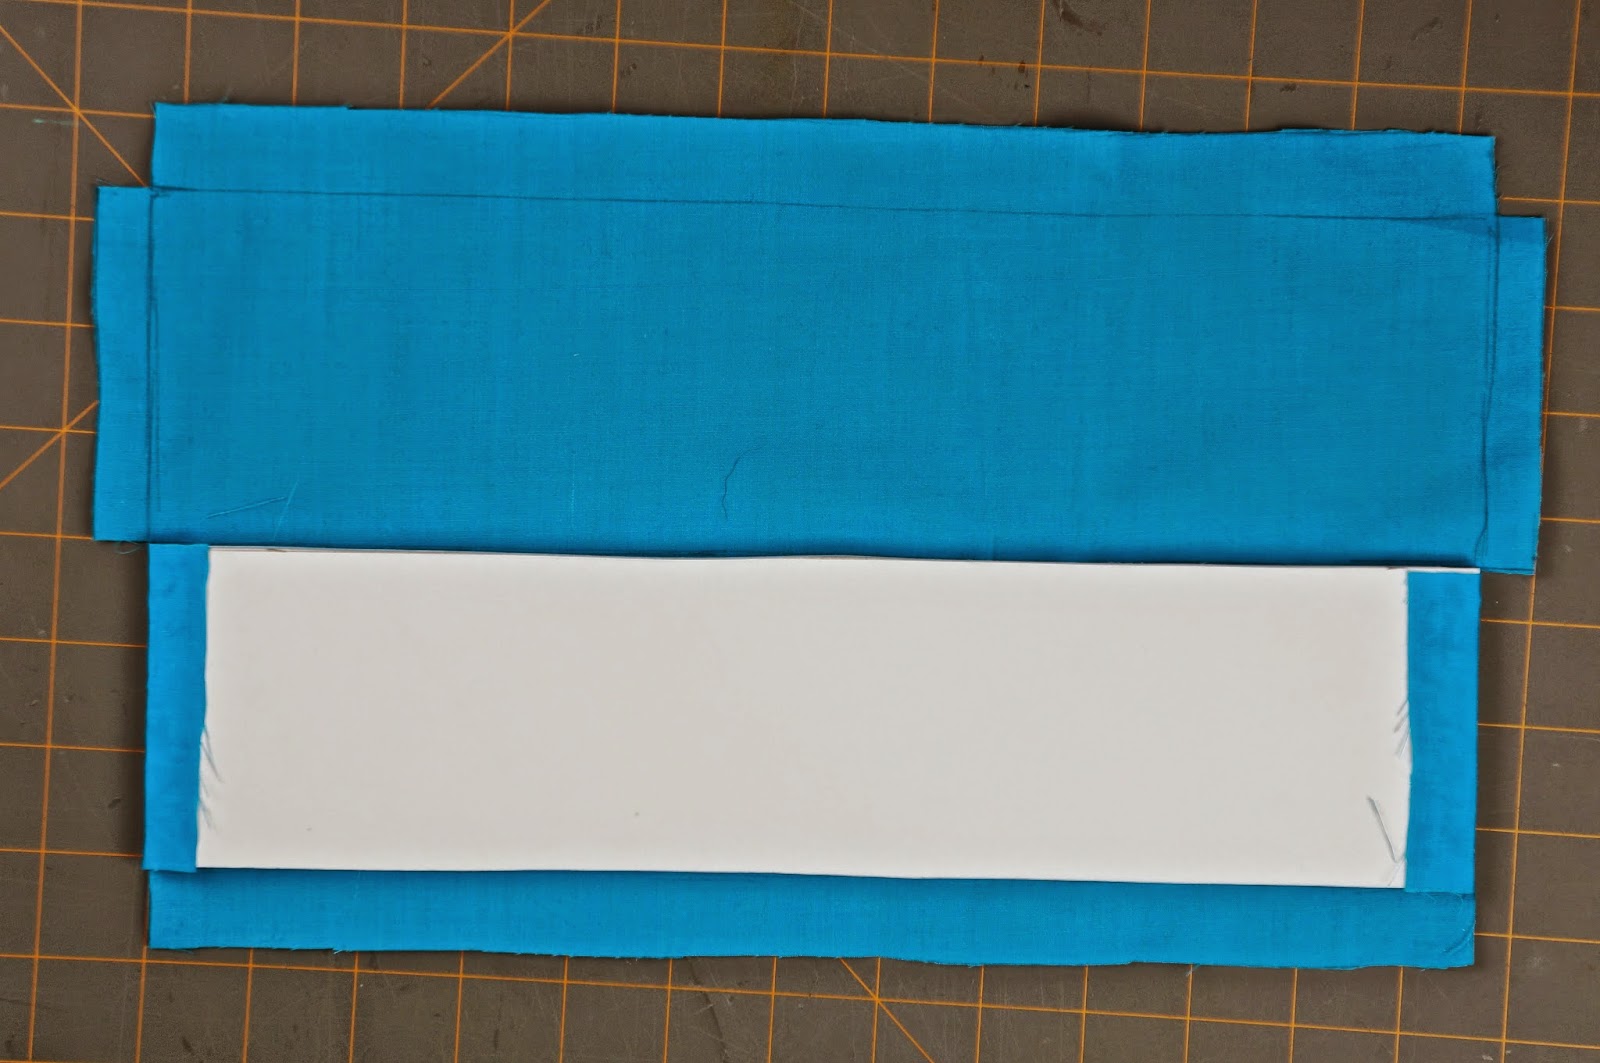
Measure the width between the sides of your box. Measure and mark a rectangle on your cardboard/foam board that is the length between the sides x 3" (12 1/2" x 3" for ours). Cut out the strip(s) with your box cutter and check to make sure they fit into your box.


Trace one of your rectangular pieces onto your fabric. Then add a strip on one the shorter side that is your material thickness + at least 1/2" (1/4" + 1/2" (3/4") for ours)(you can round up to 1" if you prefer). Do this for both of the shorter sides.


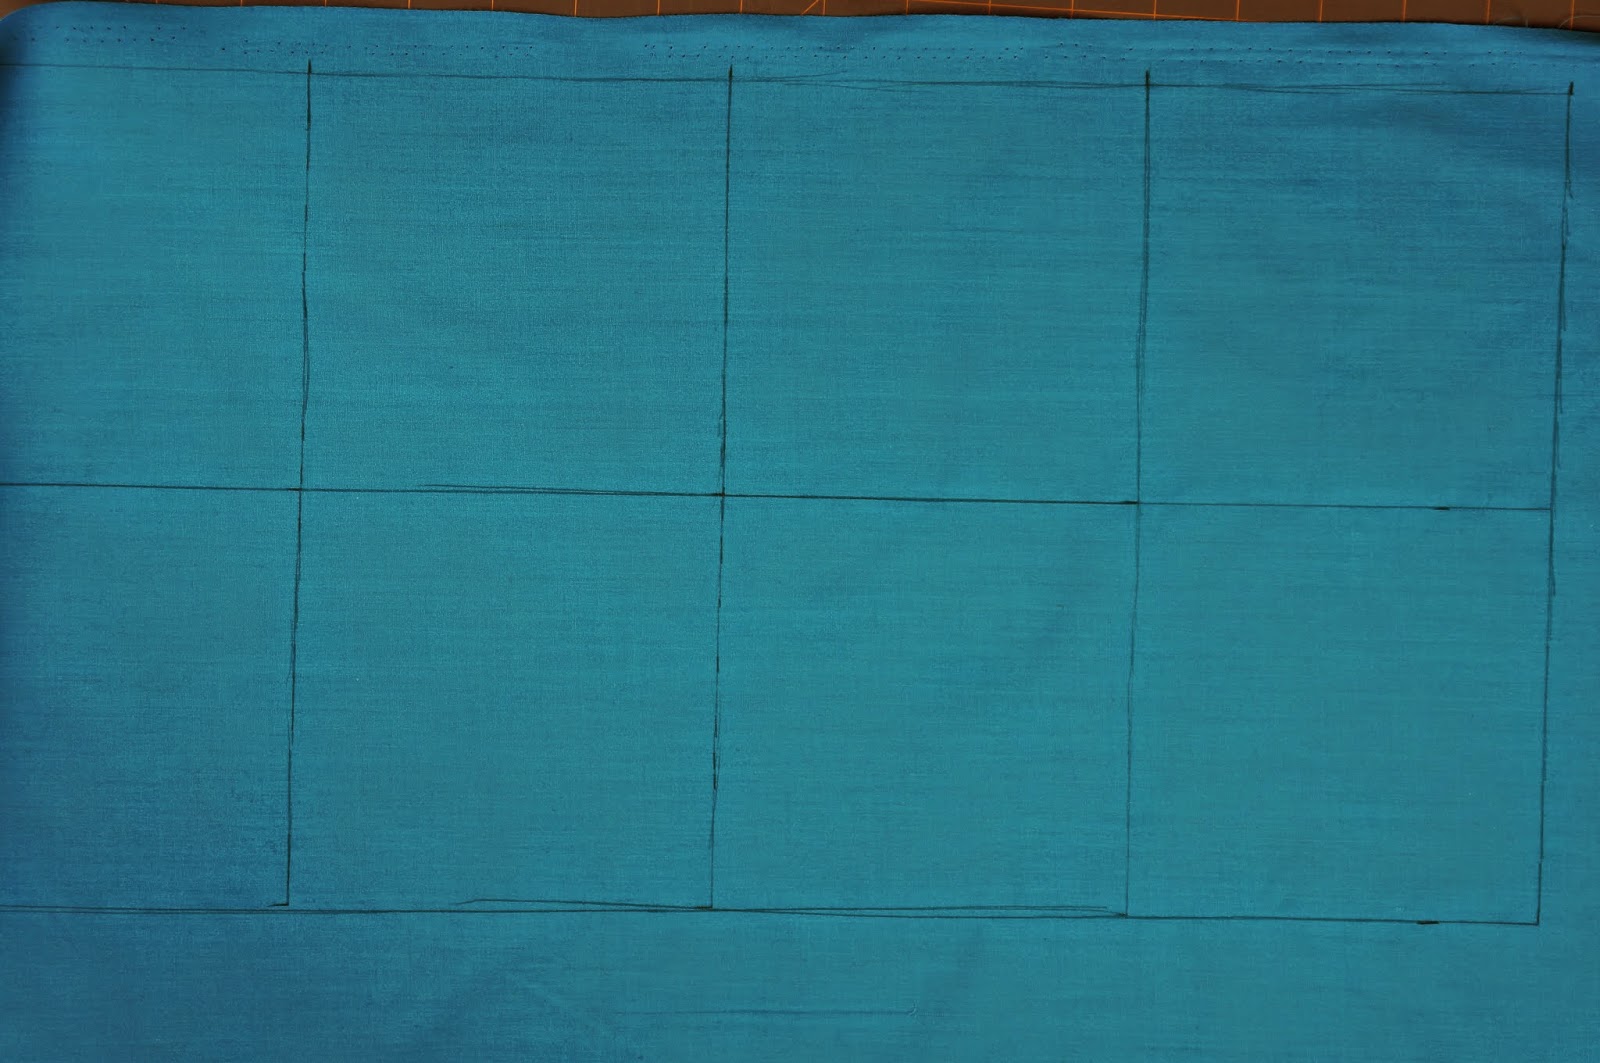
Trace your rectangular piece again beside your already marked piece leaving a space about the width of your material between them (1/4" for ours). On the rectangle you just traced add a 1/2" strip to both of the shorter sides.


Add at least an extra 1/2" strip to the 2 longer sides of your rectangle. Once you have your strips added, cut out your piece. Make sure to cut between the 2 strips on the shorter sides of the rectangle on either side.


If you have multiple rectangles to cover, use your already cutout piece as a template to make 1 for each of your shelves (3 pieces for ours).


Glue one of the foam board rectangles to the piece of fabric that has the longer tabs on the short sides. Make sure your are gluing on the side of the fabric that has any pencil marks.


Next glue the tabs on the sides of the fabric that the foam board is attached to onto the piece.


Fold over and glue the 2 remaining tabs on the shorter ends to the wrong side of the fabric.


Glue the other side of the fabric piece with the folded tabs onto the other side of your foam board. Make sure you don't glue the tabs on the long sides together. Cover the rest of your rectangular foam board pieces if you have them following the same steps.


Measure and mark center in your display box. Run some glue along the side of the foam board and glue it to the inside of the display box where you marked center. If you are making a display case that is split in thirds (2 shelves horizontally) ignore measuring center and just measure thirds.


Next glue down the excess fabric tabs to the bottom of the box.


If you have multiple horizontal shelves, measure and mark equal distances between them. For ours we measured and marked center between the middle shelf and the side of the display box. Glue your remaining shelves to the bottom of the box. Make sure to also glue the fabric tabs down.


Measure and mark rectangles 4" x 3" onto your cardboard/foam board. It will be the same size no matter how big you've decided to make your display box, only the number needed will vary (8 for ours). Once you have all of your rectangles drawn, carefully cut them out.


We're going to be making the fabric pieces to cover the shelf dividers that same way we made the fabric pieces for the shelves. Start off by tracing one of your rectangles onto your fabric. Leave a space about the width of your building material (1/4" for ours) and trace your rectangle again.


On one of the rectangles add a strip to the shorter sides that is your material thickness + at least 1/2" (1/4" + 1/2" (3/4") for ours)(you can round up to 1" if you prefer). Do this for both of the shorter sides of that rectangle. On the other rectangle add 1/4" strips to both of the shorter sides. Finally, add at least an extra 1/4" strip to the 2 longer sides of the rectangles.


Once you have your piece drawn on your fabric, cut it out. Use your fabric piece as a template for the rest of your shelf divider covers (8 total for ours). Make sure to cut between the 2 tabs on the shorter sides of the rectangle on either side.


Glue one of the foam board rectangles to the piece of fabric that has the longer tabs on the short sides. Make sure your are gluing on the side of the fabric that has any pencil marks. Next glue the tabs on the sides of the fabric that the foam board is attached to onto the piece.


Fold over and glue the 2 remaining tabs on the shorter ends to the wrong side of the fabric. Glue the other side of the fabric piece with the folded tabs onto the other side of your foam board. Make sure you don't glue the tabs on the long sides together. Cover the rest of your shelf dividers following the same steps.


Measure and mark equal distances along the shelf rows of your display case (thirds for ours).


Glue your shelf dividers onto the bottom of the display box where you marked. Make sure to also glue down the excess fabric tabs to the bottom of the box. Each cubbyhole should be 4" x 4".


Measure and mark 4" x 4" squares onto some light cardboard or card stock. You will need one for each of your cubbyholes (12 for ours). Then cut your squares out.


Next measure and mark 5" x 5" squares onto your fabric, again you will need 1 for each cubby hole (12 for ours). Once drawn, cut out.


Place one of your cardboard squares onto the center of one of your fabric squares on the wrong side of the fabric (the side with any pencil lines). Glue down the 4 corners of the fabric onto the cardboard. Next fold the sides of the fabric down onto the cardboard and glue in place. Do this for all of your squares.

*Updated with all fighter symbols


Print out your desired symbol template(s). Roughly cut around the template then carefully cut the template out. You might want to use a craft knife for this.


Trace your chosen template onto white foam or felt then cut it out.


If your symbol is multiple pieces, use your template as a guide to help place your cutout pieces onto one of your squares. Glue your symbol onto the frontside of your fabric covered square.

Repeat for all of your squares.


Using a scrap of your fabric, create a folded strip. Glue the strip onto the bottom of the backside of your square creating a loop. Do the same for all of your squares. This loop will help you change out and move your symbols around in your display box.


Push your symbol squares into your display case cubbyholes.


You can also add the Smash Bros. symbol to the top and sides of your display box if you want.


These next steps are instructions for if you are planning on hanging your display box.
Separate your picture hanging strips from one another. Pair the strips up and attach them to one another.


Peel off the backing on one side of the paired strips. Stick strips onto the top back of the display box following manufacturer's instructions. Do the same for the other pair(s) of strips. Next peel off the second backing on all of your strip pairs. Following manufacturer's instructions, attach your display case to your wall.

Now you can place all of your Amiibo's into your finished display case!
 Here's a variation of the original design.

OOOooo nice. I was planning on making actual trophy boxes (from the game - but individually) for my Amiibo.
ReplyDeleteExcellent blog post ...... thank you for sharing. :D
ReplyDeleteThanks! Enjoy!
DeleteThis is so awesome! Your blog is now officially bookmarked. Keep up the great work!
ReplyDeleteThank you! Enjoy!
DeleteDon't suppose you plan on making icon templates for the rest of the Smash-represented franchises, do you? I know not all of them have amiibo yet, but I'm attempting to "future proof" my display case, and need icons for the rest of the characters. Having them all from the same creator, and thus matching in size and the like, would be a huge help. Thanks! Cheers!
ReplyDeleteActually I was planning on adding the rest of the symbols. I was going to do it when they announced the next Amiibo's but I can have them done for early January for you. What symbols in particular do you want done?
DeleteThe only one I need for my current display case would be the Earthbound one; I made a 6x2 box in the same layout as the Smash 64 character select screen.
DeleteI uploaded a new template pack that now includes all of the symbols :)
DeleteNow you have to do a Street Fighter one :p
DeleteThis looks absolutely amazing. I'm gonna try and do this. Hopefully it comes out nice
ReplyDeleteSuch a great idea that you share with us. Amazing image of display boxes. Thank you for sharing with us.
ReplyDeleteDisplay Boxes
Cool! I bookmarked your blog! I love everything on your blog! You are AWESOME!
ReplyDeleteLooks great
ReplyDelete