Difficulty: Easy (some machine sewing skills required) ★★☆☆☆
You will need:
- The slipper template
- T-shirt transfer paper
- Heat n Bond
- Fleece
- Cotton (white)
- Ultrasuede or non slip fabric
- Fusible fleece
- An iron
- Pins
- A sewing needle
- Thread
- Scissors
- Tape
- A sewing machine
First you will need to print out the slipper template (all 4 pages).
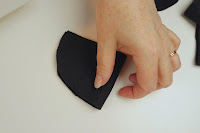
Cut out each pattern piece from the template. Please note there is an extension piece for the boot leg. Either extend your pattern the 1 1/2 inches or tape the piece in place as shown.
Using the sole pattern piece, cut 2 ultra suede, 2 cotton lining pieces, and 4 fusible fleece pieces. You may need to cut each piece separately due to the thickness of the fabric.
Using the boot leg pattern piece, fold your fleece with the fuzzy side (right side) in. Place the fold line of the pattern piece along the fold of the fabric, pin and cut. You will need to repeat this 3 times.
Cut out the remaining fleece pieces using the heel and toe pattern pieces. You require 2 of each.
Sole Assembly:
Press the cotton lining piece with a preheated hot iron (no steam), to remove any wrinkles and put aside. Place your ultra suede piece with the good side facing down. Select 1 of the fusible fleece pieces and position with the rough or glue side down away from the iron on top of the ultra suede. Press in place according to manufactures' directions. Repeat for second layer of fusible fleece on top of the first, (glue side down). Place the cotton lining on top and pin in place.
Thread a sewing machine with thread colour matching the fleece. Sew the sole sandwich(ultra suede, 2 layers of fusible fleece, and cotton lining), pressure foot width in an even curve with no wrinkles. Trim excess fleece and cotton. Repeat for other sole.
Boot Assembly:
Take 1 of the boot leg pieces. With right sides together match the long back leg seam and pin from the pointed end up about 3 inches. Sew small section of seam using pressure foot width and remembering to backstitch at beginning and end of seam.
On the boot leg piece, mark, using a pin at the 'v'. Take 1 of the toe pieces and with right sides together, pin the 'v' shape. Use lots of pins for an easy sewing with no wrinkles. (Pressure foot width, backstitching beginning and end of seam.
Select 1 heel piece, fold in half and mark center on curved edge with a pin. With right sides together, match heel curve center and back seam of boot leg. Pin remaining curved seam to boot leg. Sew pressure foot width remembering to back stitch. Repeat for other slipper.
Joining the Sole to Boot:
Mark center on the sole and boot sections for toe and heel. Identify the toe vs. the heel, the narrower end of the sole is the heel. With right sides together, match heel to center back of boot and toe to center of toe section. Pin in place and sew together through all thicknesses. Turn right sides out and make sure there are no holes or bubbles.
Zig-zag around the inside of the sole through all thicknesses of fabric to stop fraying Trim excess. Turn right side out and repeat for second boot.
Print your chosen slipper design onto t-shirt transfer paper following manufactures directions. You can use one of our designs or find your own. Make sure that any of your own designs do not exceed 4" wide by 5" long. Cut a piece of Heat n Bond that will fit your design.
Cut a piece of white cotton that extends beyond design size and press to remove any wrinkles. Following manufacturers' directions, apply Heat n Bond to one side of the cotton.


Cut out your design from the T-shirt transfer paper leaving an edge around all parts. Place design face down onto other side of cotton (that doesn't have the Heat n Bond on it) and iron on the transfer following manufacturers' directions. This step can take a long time to make sure the design is well transferred. *Do not completely remove the transfer paper backing.


Cut carefully around the design. Peel Heat n Bond backing off.
Decide where you want to place your design. We will be placing ours on the front leg section.
Fold boot leg to find center and mark with a pin. Place design area on a hard surface (like a tailors ham). For the center, measure 2" from top of foot piece for bottom placement of design. Place design transfer onto slipper (remove the pin once centered) and iron into place according to manufactures' directions. Once cooled, carefully remove transfer backing. Repeat for second slipper.
With right sides together, pin one of the remaining boot leg pieces across the top. Sew together.
Open up the boot leg and match back seam on both lining and outer boot sections. Pin together and sew.
Fold lining with right side showing onto the outer boot section. Pin at the top seam and top stitch to keep in place (pressure foot width all the way around upper edge).
On inside of boot, secure boot lining and finish inside. Pin lower edge, matching seams on outer boot and hand sew in place.

Turn your slipper right side out. Turn down top to make a cuff if you wish. Repeat for the other boot to finish it off.
Now you have your finished boot slippers!


Awesome!
ReplyDelete